本文最后更新于1 分钟前,文中所描述的信息可能已发生改变。
前言
本篇将教你如何使用ComfyUI将照片人物动起来。
最近快手开源的LivePortrait技术在全网获得了很高的关注,由于一直特别喜欢AI的新兴事物,所以就决定试试。
先看看效果:

它们公布的这个开源模型所用的算法运算效率非常高,他们提出了一种基于隐式关键点(implicit-keypoint)的框架,能够在保证计算效率的同时,提供更好的可控性和泛化能力,与传统的依赖于扩散模型的生成来说,速度非常可观。
特点:
- 他们使用了大约6900万张高质量的图像帧进行训练。
- 结合图像和视频数据进行训练,以增强模型的泛化能力。
- 改进了网络结构,提升了模型的计算效率。
- 设计了更好的运动转换和优化目标。
- 发现紧凑的隐式关键点可以有效地表示一种blendshapes,并提出了拼接(stitching)和两个重定向(retargeting)模块,以增强可控性。
推理速度
根据论文中的实验数据,该框架在生成质量和推理速度上均优于扩散模型。使用PyTorch在RTX 4090 GPU上推理时,生成速度达到12.8ms。
细节可控
而且他们设计并加入了重定向模块,可以轻松实现表情中细节的可控化。 比如,用来控制嘴和眼睛的张开大小的模块。 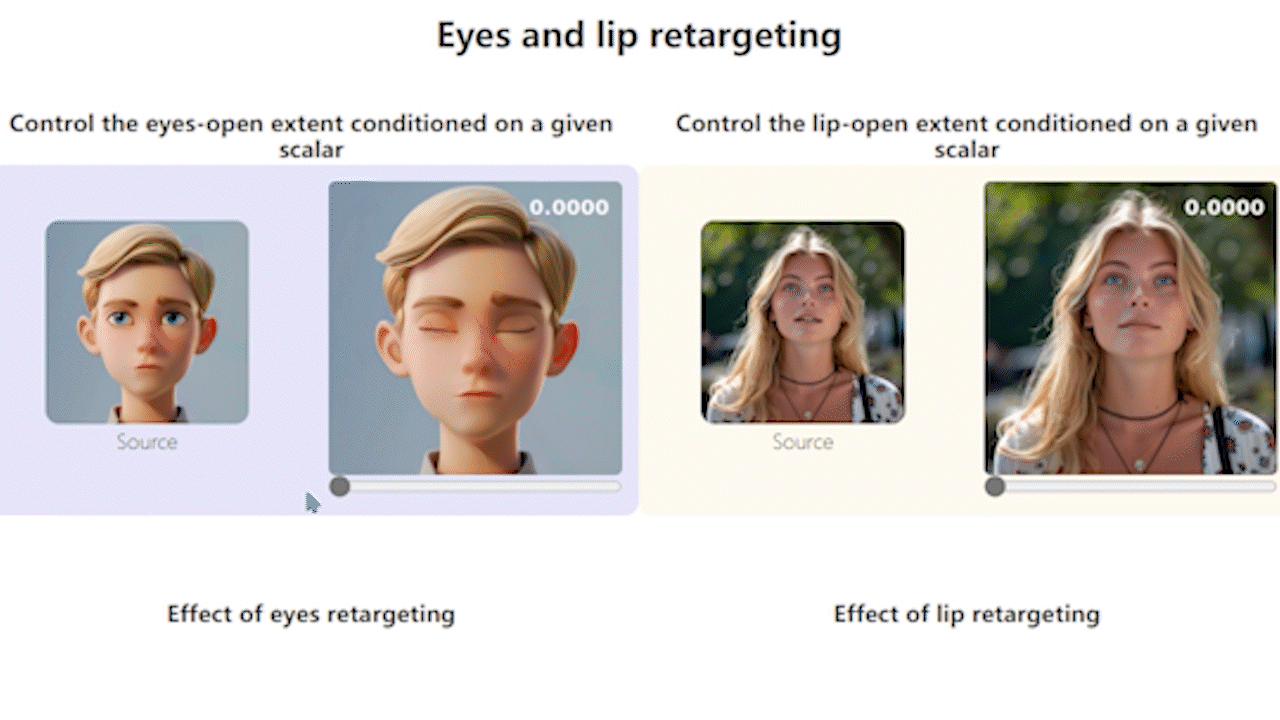
并且通过一些后期的微调,可以将面部表情迁移到动物的面部。 
链接
具体的论文地址如下:
https://arxiv.org/pdf/2407.03168
开源链接如下:
https://github.com/KwaiVGI/LivePortrait
在ComfyUI中安装
为了方便起见,大家可以直接导入我的工作流。
工作流地址:
链接:https://pan.xunlei.com/s/VO1Rdh08CTHcvCMkqYG4pyjUA1# 提取码:m8ec
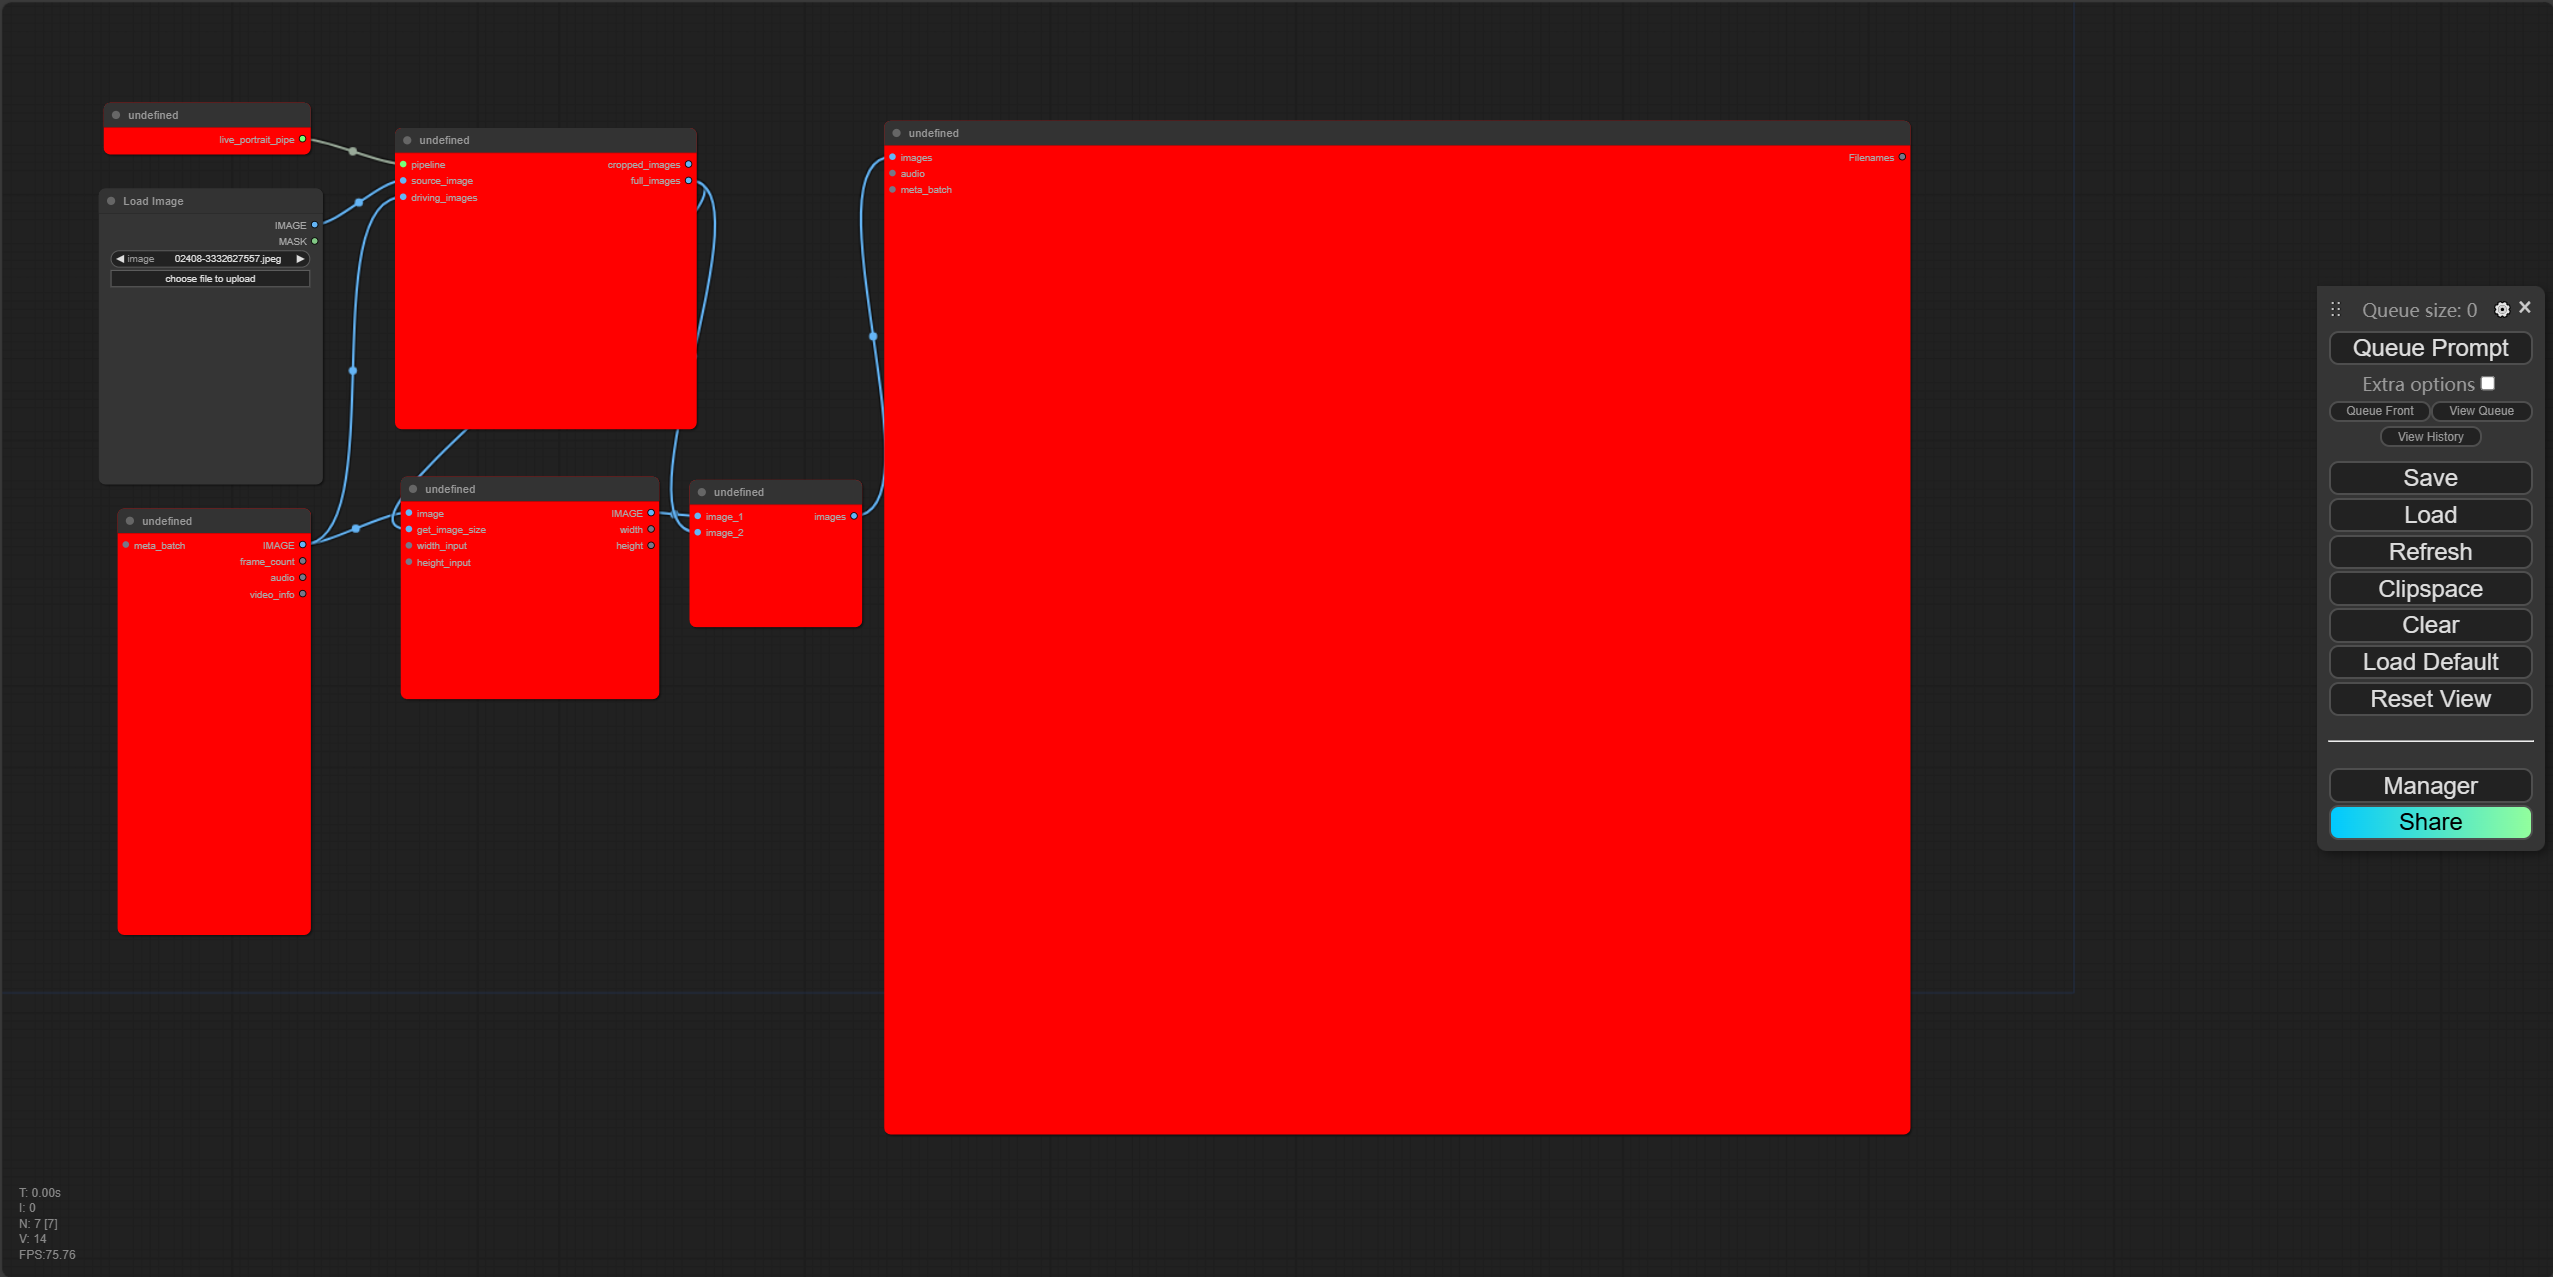
导入后节点会爆红,表示这些节点都还没有安装。
安装自定义节点
点击右边的Manager,点击Custom Nodes Manager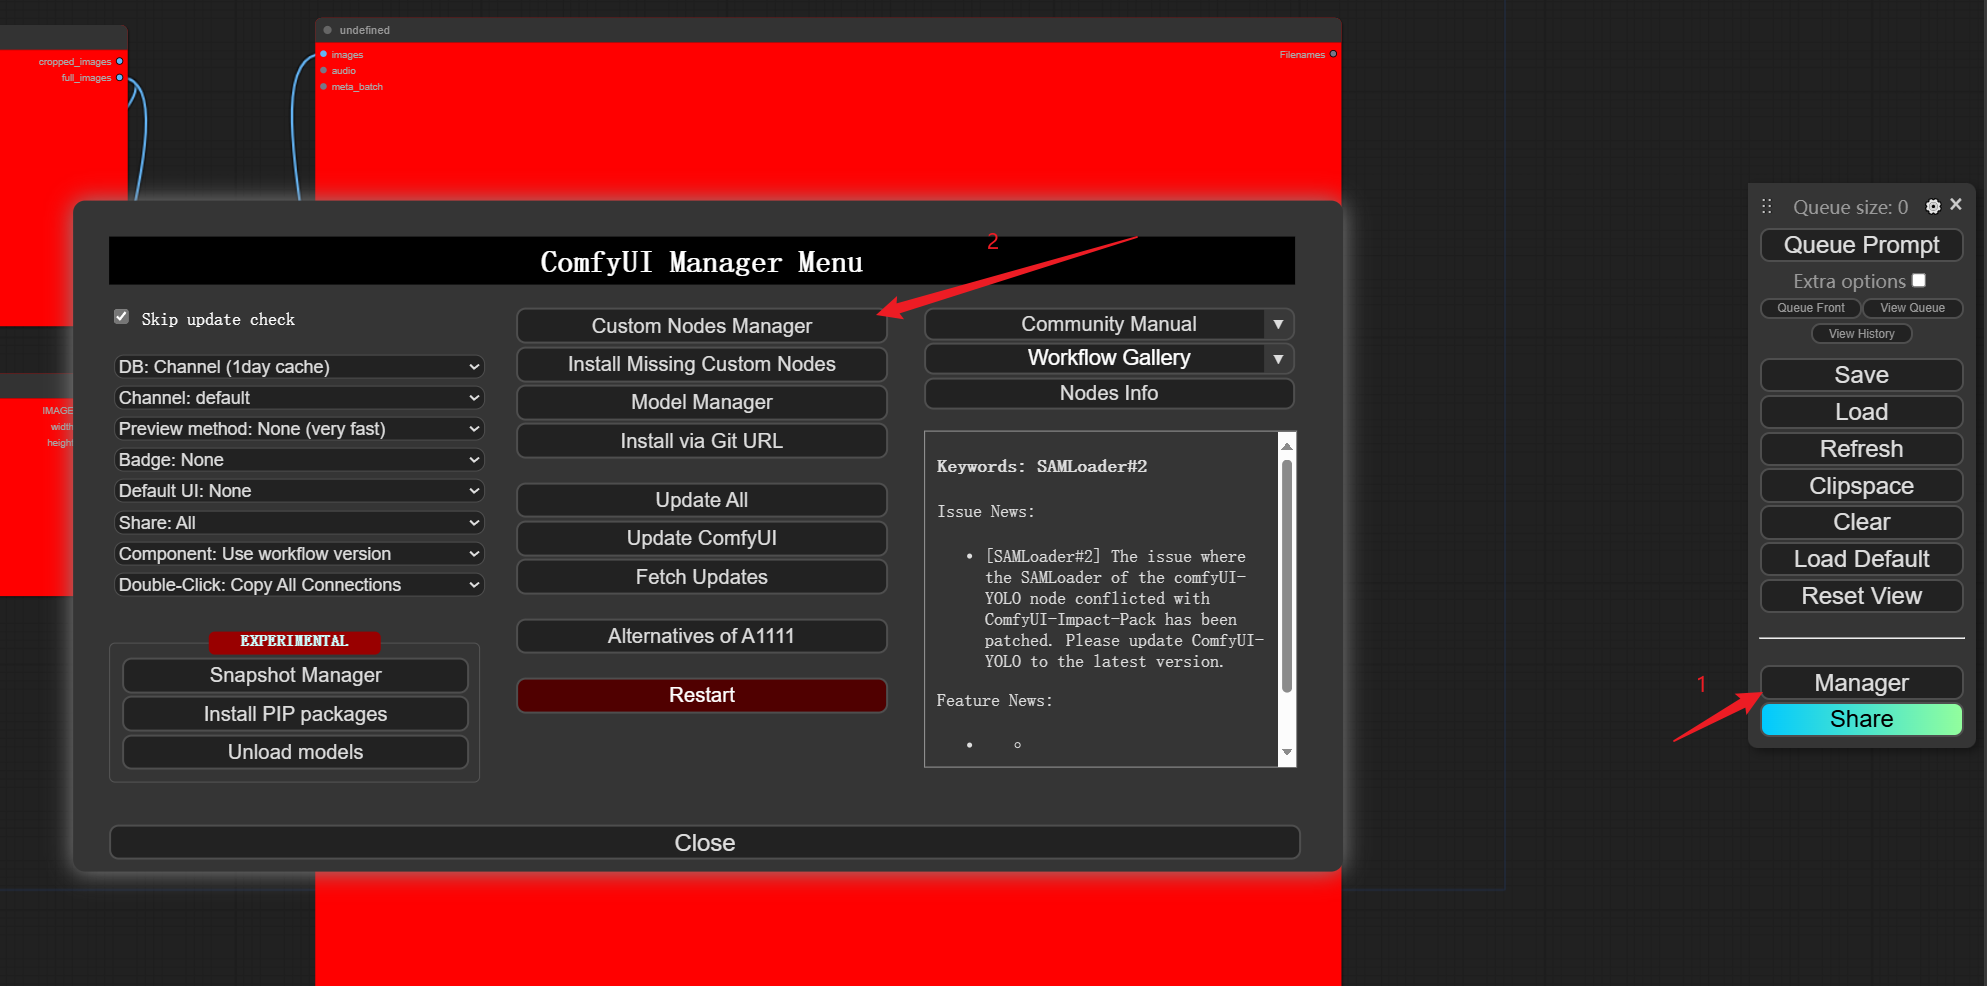
过滤missing节点 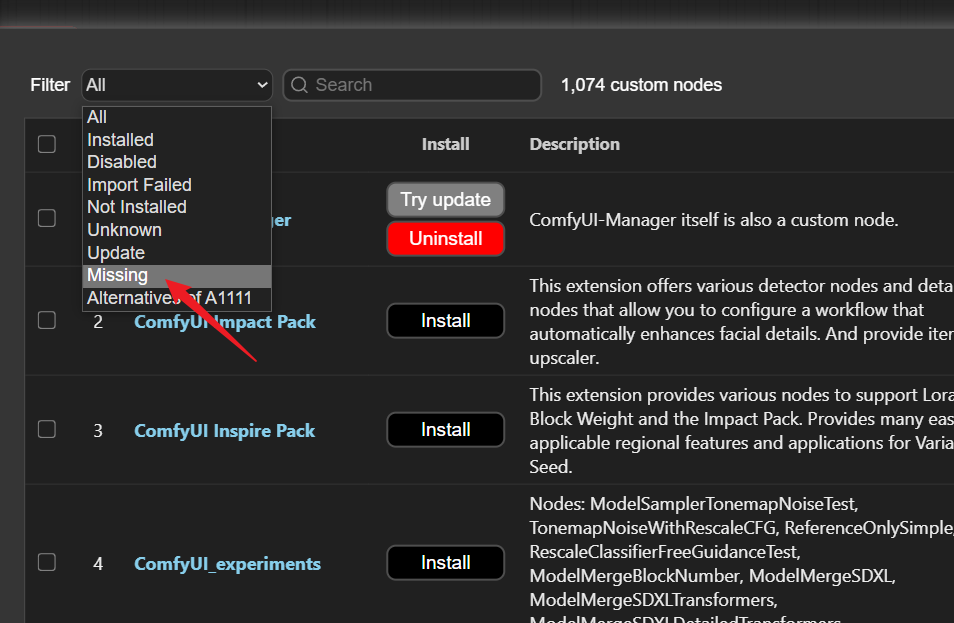
依次全部install 安装,安装完成后,按照提示重启ComfyUI
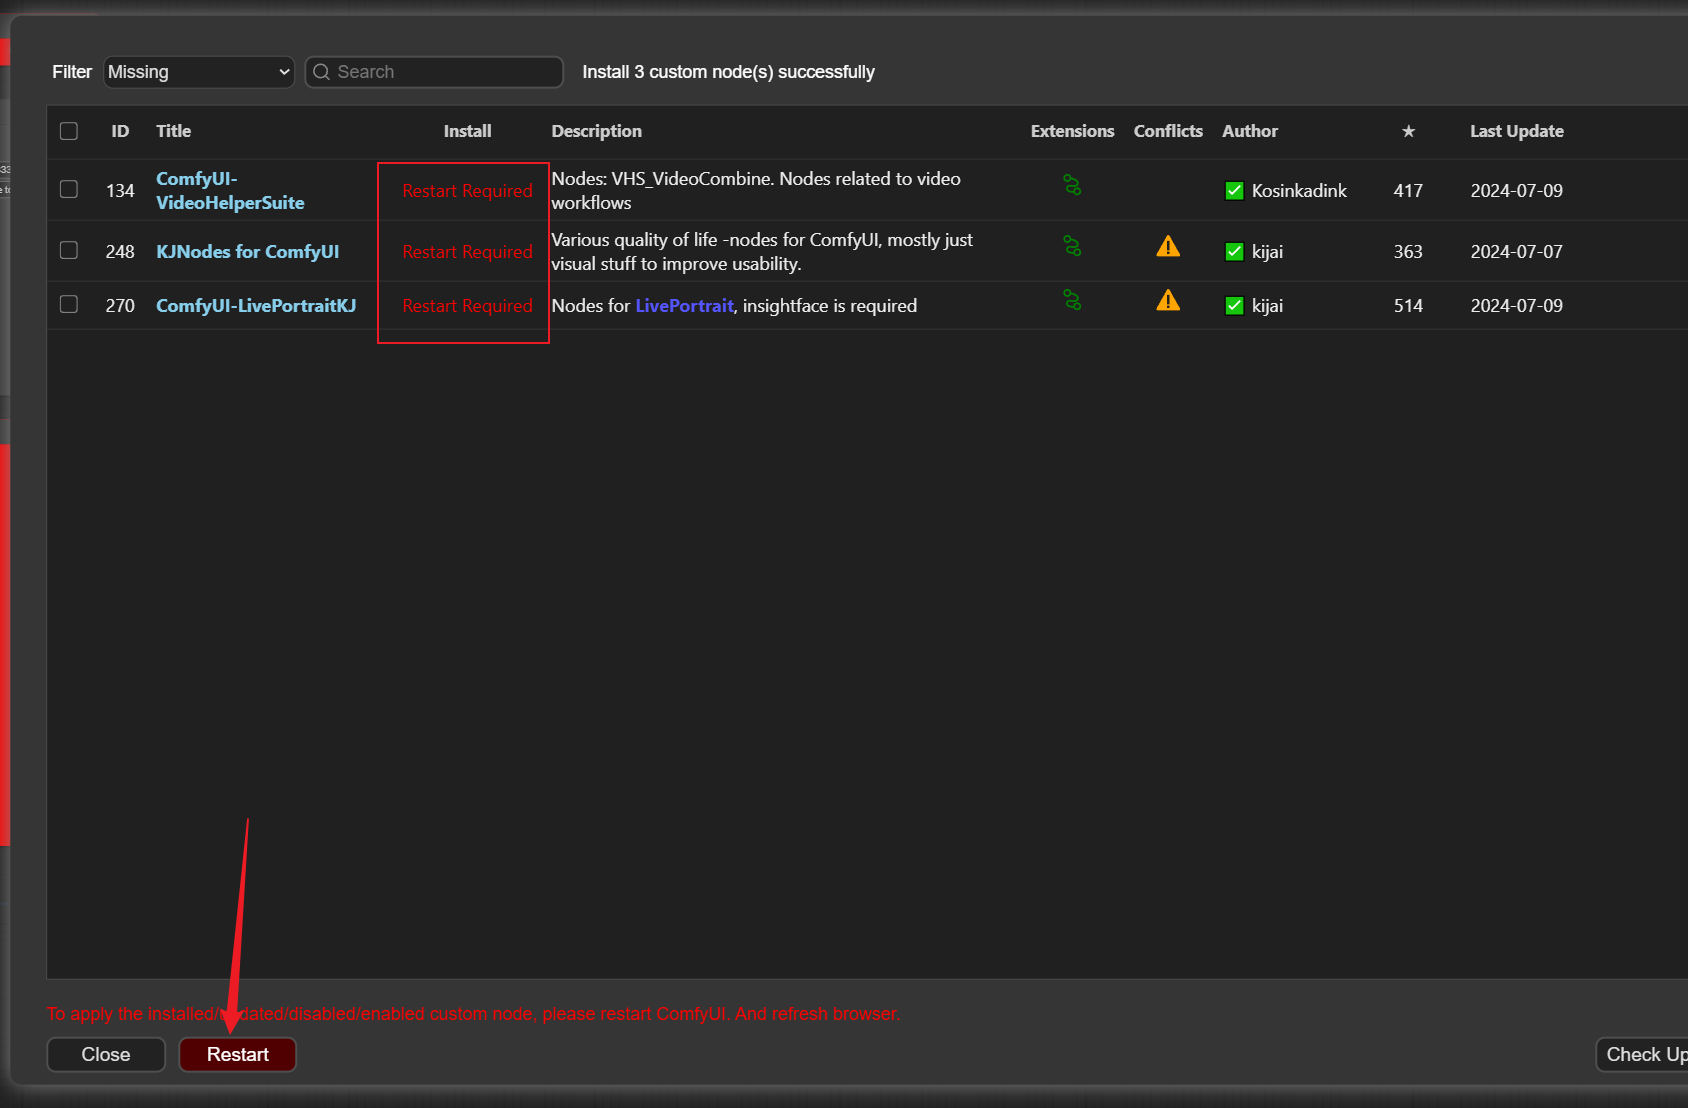
如果重启后还是爆红,应该是insightface没有安装成功。
首先,你需要安装insightface,打开到ComfyUI所在文件夹,执行如下操作。
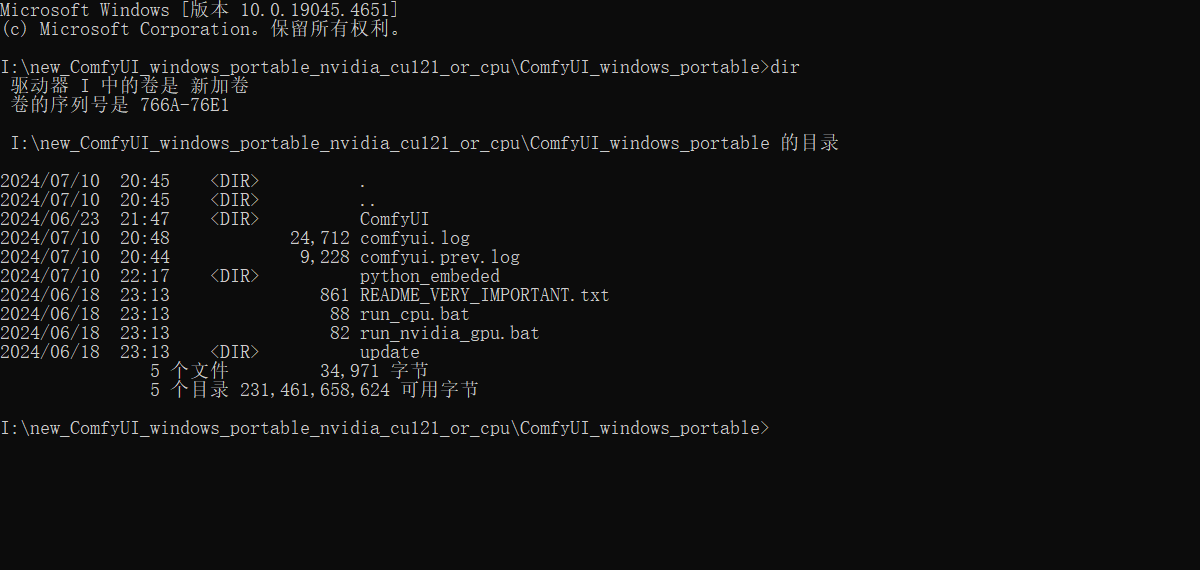
如以我的路径为例。
python_embeded\python.exe -m pip install insightface报错1:
如果出现类似于 No module named 'Cython' 的报错,则说明没有安装Cython,需要安装。 执行如下命令:
python_embeded\python.exe -m pip install Cython报错2:
如果出现如下报错:
      creating build\lib.win-amd64-cpython-311\insightface\thirdparty\face3d\mesh\cython
      copying insightface\thirdparty\face3d\mesh\cython\mesh_core.cpp -> build\lib.win-amd64-cpython-311\insightface\thirdparty\face3d\mesh\cython
      copying insightface\thirdparty\face3d\mesh\cython\mesh_core.h -> build\lib.win-amd64-cpython-311\insightface\thirdparty\face3d\mesh\cython
      copying insightface\thirdparty\face3d\mesh\cython\mesh_core_cython.cpp -> build\lib.win-amd64-cpython-311\insightface\thirdparty\face3d\mesh\cython
      creating build\lib.win-amd64-cpython-311\insightface\data\images
      copying insightface\data\images\Tom_Hanks_54745.png -> build\lib.win-amd64-cpython-311\insightface\data\images
      copying insightface\data\images\mask_black.jpg -> build\lib.win-amd64-cpython-311\insightface\data\images
      copying insightface\data\images\mask_blue.jpg -> build\lib.win-amd64-cpython-311\insightface\data\images
      copying insightface\data\images\mask_green.jpg -> build\lib.win-amd64-cpython-311\insightface\data\images
      copying insightface\data\images\mask_white.jpg -> build\lib.win-amd64-cpython-311\insightface\data\images
      copying insightface\data\images\t1.jpg -> build\lib.win-amd64-cpython-311\insightface\data\images
      creating build\lib.win-amd64-cpython-311\insightface\data\objects
      copying insightface\data\objects\meanshape_68.pkl -> build\lib.win-amd64-cpython-311\insightface\data\objects
      copying insightface\thirdparty\face3d\mesh\cython\mesh_core_cython.c -> build\lib.win-amd64-cpython-311\insightface\thirdparty\face3d\mesh\cython
      copying insightface\thirdparty\face3d\mesh\cython\mesh_core_cython.cpp -> build\lib.win-amd64-cpython-311\insightface\thirdparty\face3d\mesh\cython
      copying insightface\thirdparty\face3d\mesh\cython\mesh_core_cython.pyx -> build\lib.win-amd64-cpython-311\insightface\thirdparty\face3d\mesh\cython
      copying insightface\thirdparty\face3d\mesh\cython\setup.py -> build\lib.win-amd64-cpython-311\insightface\thirdparty\face3d\mesh\cython
      running build_ext
      building 'insightface.thirdparty.face3d.mesh.cython.mesh_core_cython' extension
      creating build\temp.win-amd64-cpython-311
      creating build\temp.win-amd64-cpython-311\Release
      creating build\temp.win-amd64-cpython-311\Release\insightface
      creating build\temp.win-amd64-cpython-311\Release\insightface\thirdparty
      creating build\temp.win-amd64-cpython-311\Release\insightface\thirdparty\face3d
      creating build\temp.win-amd64-cpython-311\Release\insightface\thirdparty\face3d\mesh
      creating build\temp.win-amd64-cpython-311\Release\insightface\thirdparty\face3d\mesh\cython
      "C:\Program Files (x86)\Microsoft Visual Studio\2022\BuildTools\VC\Tools\MSVC\14.39.33519\bin\HostX86\x64\cl.exe" /c /nologo /O2 /W3 /GL /DNDEBUG /MD -Iinsightface/thirdparty/face3d/mesh/cython -II:\new_ComfyUI_windows_portable_nvidia_cu121_or_cpu\ComfyUI_windows_portable\python_embeded\Lib\site-packages\numpy\core\include -II:\new_ComfyUI_windows_portable_nvidia_cu121_or_cpu\ComfyUI_windows_portable\python_embeded\include -II:\new_ComfyUI_windows_portable_nvidia_cu121_or_cpu\ComfyUI_windows_portable\python_embeded\Include "-IC:\Program Files (x86)\Microsoft Visual Studio\2022\BuildTools\VC\Tools\MSVC\14.39.33519\include" "-IC:\Program Files (x86)\Microsoft Visual Studio\2022\BuildTools\VC\Auxiliary\VS\include" "-IC:\Program Files (x86)\Windows Kits\10\include\10.0.20348.0\ucrt" "-IC:\Program Files (x86)\Windows Kits\10\\include\10.0.20348.0\\um" "-IC:\Program Files (x86)\Windows Kits\10\\include\10.0.20348.0\\shared" "-IC:\Program Files (x86)\Windows Kits\10\\include\10.0.20348.0\\winrt" "-IC:\Program Files (x86)\Windows Kits\10\\include\10.0.20348.0\\cppwinrt" /EHsc /Tpinsightface/thirdparty/face3d/mesh/cython/mesh_core.cpp /Fobuild\temp.win-amd64-cpython-311\Release\insightface/thirdparty/face3d/mesh/cython/mesh_core.obj
      mesh_core.cpp
      insightface/thirdparty/face3d/mesh/cython/mesh_core.cpp(147): warning C4244: “=”: 从“int”转换到“float”,可能丢失数据
      insightface/thirdparty/face3d/mesh/cython/mesh_core.cpp(147): warning C4244: “=”: 从“int”转换到“float”,可能丢失数据
      insightface/thirdparty/face3d/mesh/cython/mesh_core.cpp(210): warning C4244: “=”: 从“int”转换到“float”,可能丢失数据
      insightface/thirdparty/face3d/mesh/cython/mesh_core.cpp(210): warning C4244: “=”: 从“int”转换到“float”,可能丢失数据
      insightface/thirdparty/face3d/mesh/cython/mesh_core.cpp(294): warning C4244: “=”: 从“int”转换到“float”,可能丢失数据
      insightface/thirdparty/face3d/mesh/cython/mesh_core.cpp(294): warning C4244: “=”: 从“int”转换到“float”,可能丢失数据
      "C:\Program Files (x86)\Microsoft Visual Studio\2022\BuildTools\VC\Tools\MSVC\14.39.33519\bin\HostX86\x64\cl.exe" /c /nologo /O2 /W3 /GL /DNDEBUG /MD -Iinsightface/thirdparty/face3d/mesh/cython -II:\new_ComfyUI_windows_portable_nvidia_cu121_or_cpu\ComfyUI_windows_portable\python_embeded\Lib\site-packages\numpy\core\include -II:\new_ComfyUI_windows_portable_nvidia_cu121_or_cpu\ComfyUI_windows_portable\python_embeded\include -II:\new_ComfyUI_windows_portable_nvidia_cu121_or_cpu\ComfyUI_windows_portable\python_embeded\Include "-IC:\Program Files (x86)\Microsoft Visual Studio\2022\BuildTools\VC\Tools\MSVC\14.39.33519\include" "-IC:\Program Files (x86)\Microsoft Visual Studio\2022\BuildTools\VC\Auxiliary\VS\include" "-IC:\Program Files (x86)\Windows Kits\10\include\10.0.20348.0\ucrt" "-IC:\Program Files (x86)\Windows Kits\10\\include\10.0.20348.0\\um" "-IC:\Program Files (x86)\Windows Kits\10\\include\10.0.20348.0\\shared" "-IC:\Program Files (x86)\Windows Kits\10\\include\10.0.20348.0\\winrt" "-IC:\Program Files (x86)\Windows Kits\10\\include\10.0.20348.0\\cppwinrt" /EHsc /Tpinsightface/thirdparty/face3d/mesh/cython/mesh_core_cython.cpp /Fobuild\temp.win-amd64-cpython-311\Release\insightface/thirdparty/face3d/mesh/cython/mesh_core_cython.obj
      mesh_core_cython.cpp
      insightface/thirdparty/face3d/mesh/cython/mesh_core_cython.cpp(36): fatal error C1083: 无法打开包括文件: “Python.h”: No such file or directory
      error: command 'C:\\Program Files (x86)\\Microsoft Visual Studio\\2022\\BuildTools\\VC\\Tools\\MSVC\\14.39.33519\\bin\\HostX86\\x64\\cl.exe' failed with exit code 2
      [end of output]

  note: This error originates from a subprocess, and is likely not a problem with pip.
  ERROR: Failed building wheel for insightface
Failed to build insightface
ERROR: Could not build wheels for insightface, which is required to install pyproject.toml-based projects
上面的问题一般是由于ComfyUI的python环境做了精简,解决方法如下:
- 可以先查看ComfyUI的python的版本:
python_embeded\python.exe -V- 手动下载或使用conda创建同一个版本的python环境,然后将Python目录下的
include和libs目录复制到ComfyUI的python_embeded目录下。
- 操作如下:
conda create -n python3118 python=3.11.8- 打开conda环境所在目录,我的目录如下:
C:\Users\formero\miniconda3\envs\py3118
将其中的include 和 libs 目录复制到ComfyUI的python_embeded目录下。
- 重新安装insightface:
python_embeded\python.exe -m pip install insightface- 安装成功
双击run_nvidia_gpu.bat重新运行,即可看到爆红已经消失了。
测试照片动画效果
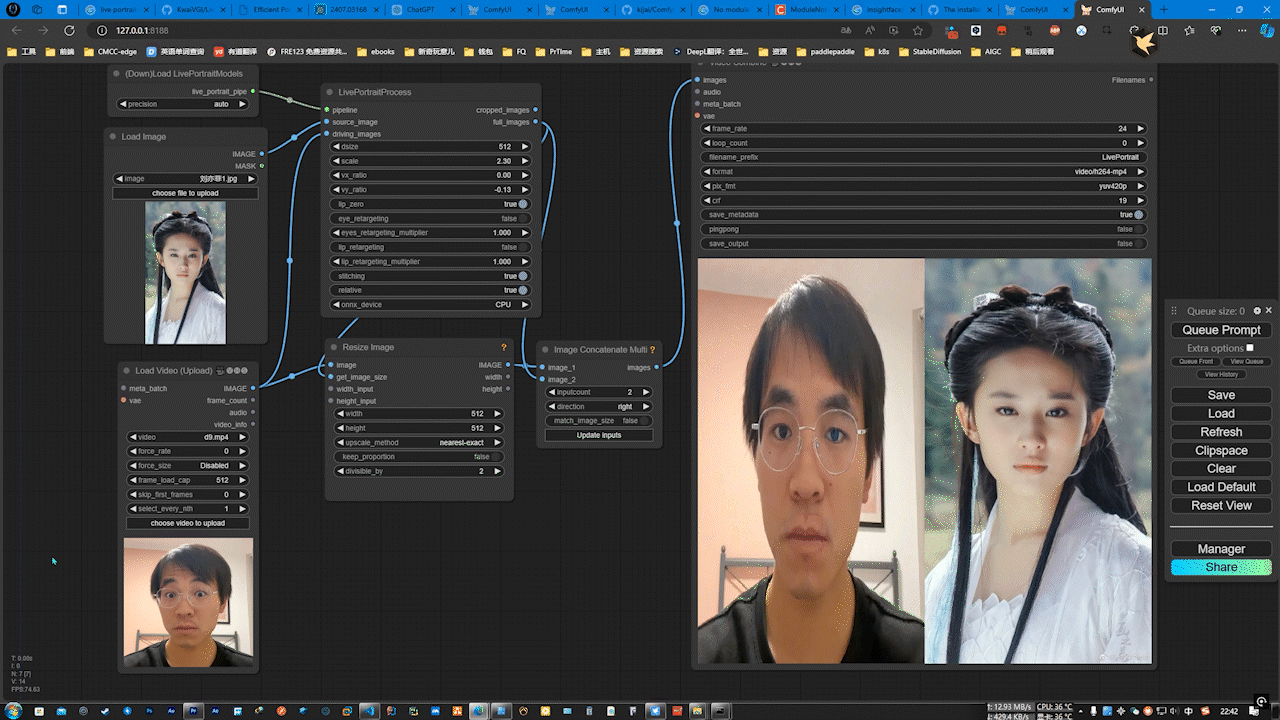
分别点击这两处地方,上传想要制作的动画效果的图片和面部迁移的视频。
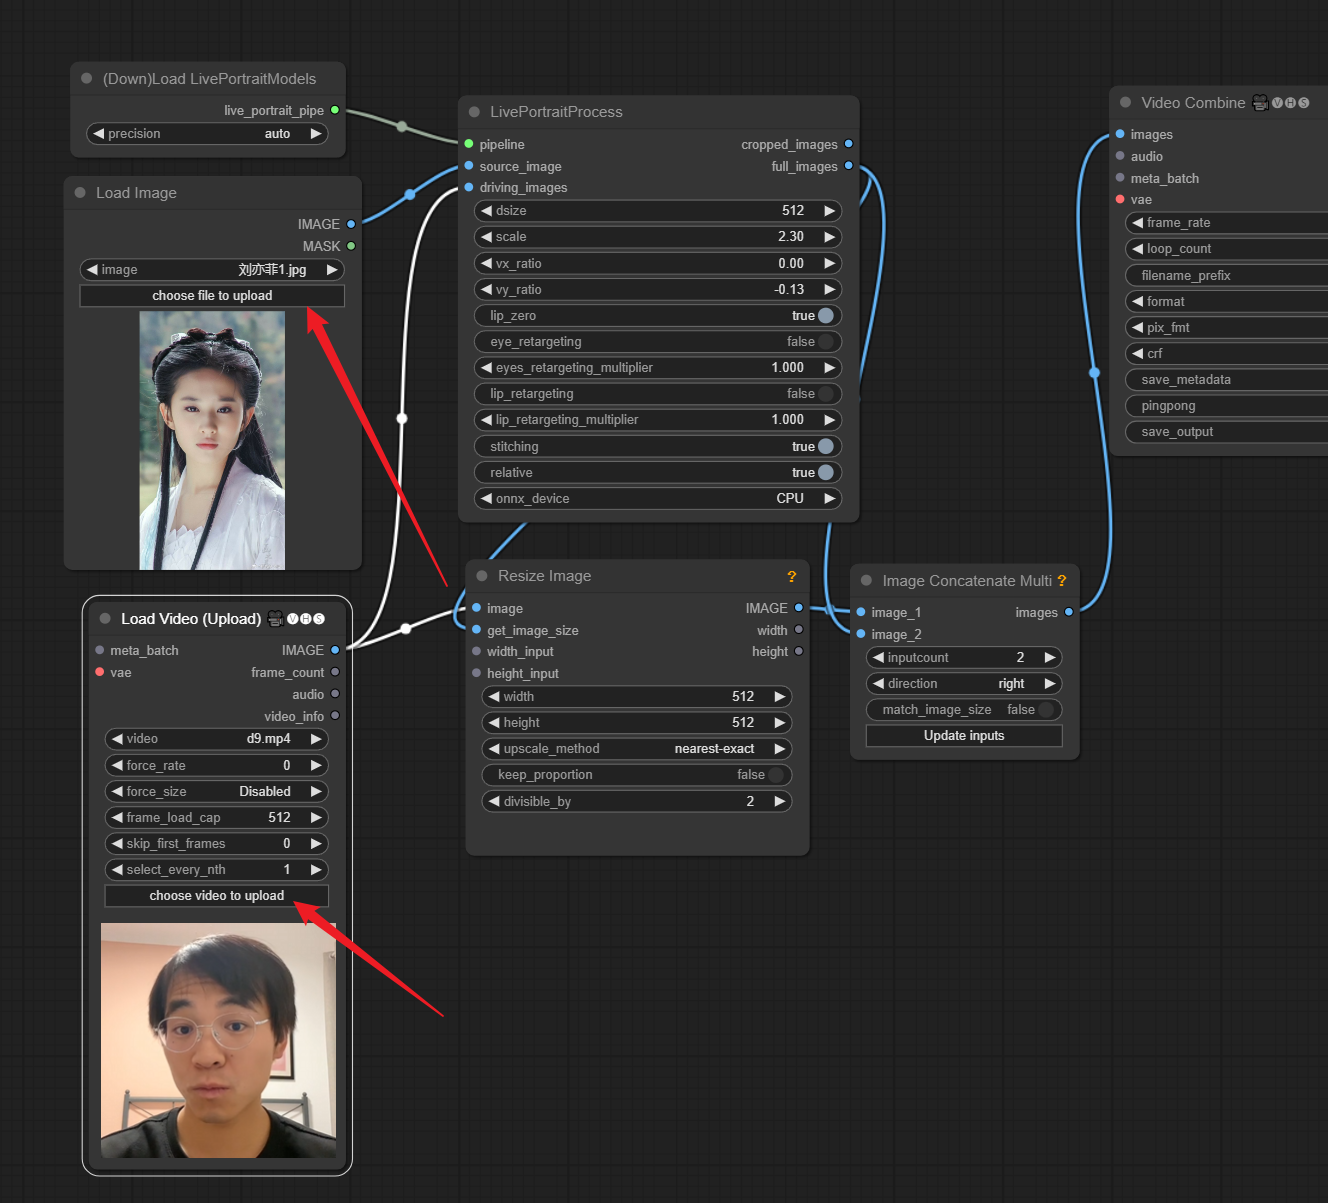
这里使用的是神仙姐姐的照片,吼吼~
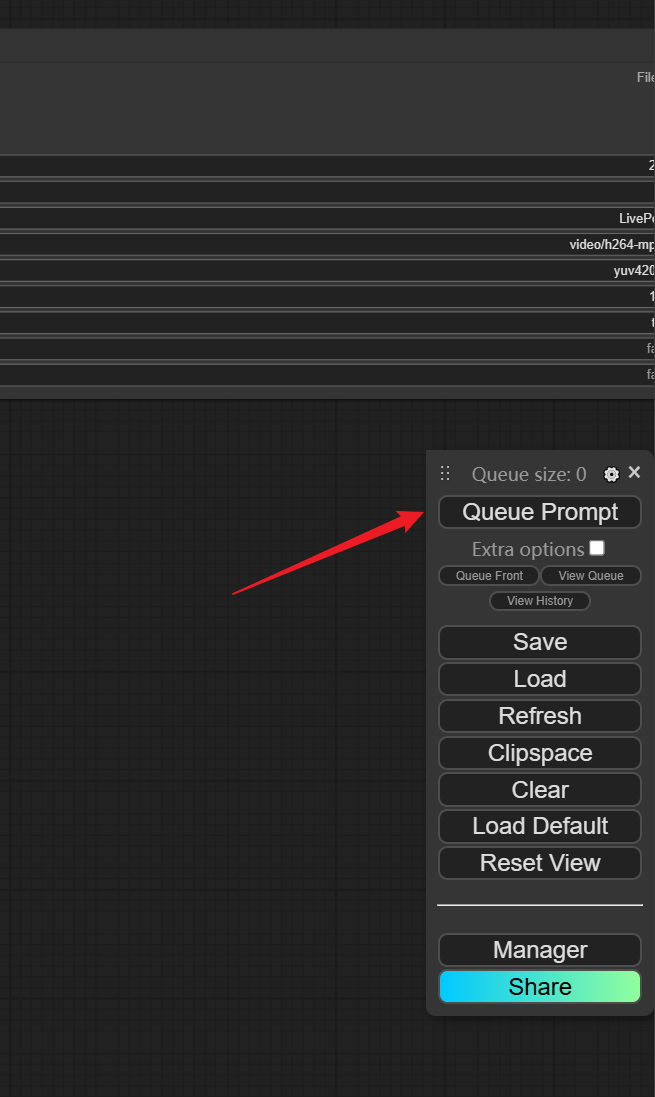
完事儿点击右侧的Queue Prompt按钮,开始运行,模型会自动下载。
如果网络原因下载失败,可以直接用我上面云盘中打包好的模型,解压缩到modesl文件夹下即可。
以下是运行结果,可以看到效果非常出众。